Journeys overview
Journeys are the feature for building impact services in Turn. Journeys are heavily inspired by the original ideas in Hypercard and Hypertalk.
Journeys were previously called stacks. The words "stacks" and "journeys" may be used interchangeably in our documentation and you may still see stacks referred to in things like function names.
In Turn, journeys are containers that hold one or more cards and the relationships between cards. Cards perform the various steps that make up your impact service using functions and expressions.
The available functions and expressions are described below with examples and common errors.
Journeys coding language
Impact services built using journeys are described using a custom coding language. We sometimes refer to this as the Journeys DSL, which stands for Journeys Domain Specific Language.
Let's look at the code language structure and syntax.
Journey code block
Think of a journey as a container that holds multiple cards.
Card code block
Think of a card as performing one or more steps on your impact service. Cards make use of various functions and expressions to describe these steps.
Example
The following example creates an empty card for illustrative purposes.
card CardName do
    ...
end
Key things to note
- The code structure to create a card is similar to the code structure to create a journey.
- Your card code block will always be defined within a journey code block.
- Your card must have a name.
- The
docommand initiates the card. - The
endcommand concludes the card. - All logic of the card will be added between the do and the end commands.
- Logic will comprise functions, expressions, etc. See the examples below.
Using comments
Any line of text in your journey that is prefixed with a # sign will become a comment. This means it will not be an executable line of code but will be ignored when the journey runs.
card MyCard do
    # This is a comment
end
Documenting your Journeys
Code comments are great to document individual lines within a Card but sometimes these can be too limiting. When one wants to describe larger overarching concerns like providing more detail behind specific design decisions, linking to external documentation or research, or to describe key implementation details, Markdown documentation blocks are what you'd want to use.
You can use comments in canvas Journeys and Markdown blocks in code Journeys
Your first journey
Now that we know a journey contains one or more cards, and each card contains logic that describe your impact service, let's put it together. The example shows you how journey blocks and card blocks fit together to create a very simple journey.
Example
The following example creates a simple journey that sends a single text message to a user, saying "Hello World!".
card MyCard do
  text("Hello world!")
end
Relating cards
Cards describe the steps of your impact service. Each card describes a specific point in a series of interactions.
The first card is always what the journey starts with. Thereafter, the order in which cards appear in your journey code is not important. What is important is to describe the relationships between cards, as that determines how users will navigate between them.
There are two main ways to describe what happens after each card, i.e. the then or the when condition.
The then condition
The then relationship is used to connect one card with another card.
Syntax
card FirstCard do
  text("Hello world!")
  then(NextCard)
end
We also support an older syntax, which states the next card to navigate to for the whole card.
We suggest using the then() function at the bottom of a card, but you may still sometimes encounter this syntax in playbooks and code examples:
card FirstCard, then: NextCard do
  text("Hello world!")
end
Example
This example shows how to use the then function to indicate when a card should immediately be followed by another card. In this case two text messages will be sent immediately after each other, first "this is the first card" and then "this is the second card".
card One do
    text("this is the first card")
    then(Two)
end

card Two do
    text("this is the second card")
end
Key things to note
- Without
thenonly the first text message will be sent.
The when condition
The when clause is used to add conditions that control the execution order of a card.
You can include this in the then function within a card, or describe the condition at the start of a card.
Syntax
New style:
card CardName do
    ...
    then(HappyPath when some_condition)
    then(CardError)
end

card HappyPath do
  text("Welcome!")
end

card CardError do
  text("Sorry, we cannot help you")
end
Old style with Card pattern matching - note that in this case we have 2 cards with the same name, but different conditions under which they would be run:
card CardName, then: ProcessContact do
    ...
end

card ProcessContact when some_condition do
  text("Welcome!")
end

card ProcessContact do
  text("Sorry, we cannot help you")
end
Note that for the older style of navigation, the then syntax we used a comma and a colon (CardName, then:).
However when should occur immediately after the cardName without a comma or colon.
Boolean Operators
This is a list of the comparison functions that can be used within Journeys:
<- less than>- greater than>=- greater than or equal to<=- less than or equal to=- equal to==- equal to!=- not equal to<>- not equal to
And they can be combined with the standard and and or operators, as well as the not keyword.
You can use parenthesis to determine the order of evaluation:
(true or false) and falsewill evaluate tofalsetrue or (false and false)will evaluate totrue
Finally, when it comes to truthy and falsey values:
- variables that are nil or null will evaluate as
false - simply checking a variable that is not the boolean value of
true, will evaluate tofalse. So any use ofwhen some_variable dowill evaluate to false. Otherwise, you must include a comparison. To expand, some language might declare that a non-empty string or non-empty list evaluates to true, but this is not the case in Journeys.
If you're ever unsure about what an expression is evaluating to, you can use the log function to view the output in the simulator.
Example
This following example elaborates a bit on the previous example by introducing conditions between cards.
card One, then: Two do
    text("this is the second card")
    age = ask("What is your age?")
    then(Boomer when age > 18)
    then(OlderTeen when age > 16 and age <= 18)
    then(CatchAll)
end

card Boomer do
    text("Hello boomer")
end

card OlderTeen when age > 16 and age <= 18 do
    text("Hey there!")
end

card CatchAll do
    text("This service is too cool for you")
end
Now the same logic, but using the older style; you'll notice that card One proceeds to card Two with the then: keyword. One important difference here is that we're using the ask() function which waits for user input before proceeding.
Card Two is defined multiple times, two of which have conditions that guard the card. Depending on the user's response the system will automatically select the card Three for which the condition resolves to true. The last card Two has no condition which means it will always resolve to true and functions as a default fallback.
card One, then: Two do
    text("this is the second card")
    age = ask("What is your age?")
end

card Two when age > 18 do
    text("Hello boomer")
end

card Two when age > 16 and age <= 18 do
    text("Hey there!")
end

card Two do
    text("This service is too cool for you")
end
Triggers
Triggers are defined at the top of your journey and specify when your journey should execute. For example, you can use the following Trigger to have your journey start when a users sends the message "hi" to your service:
trigger(on: "MESSAGE RECEIVED") when has_phrase(event.message.text.body, "hi")

card FirstCard do
    text("Welcome!")
end
Once triggered, the journey will start executing from its first card.
A Trigger is composed of an event like MESSAGE RECEIVEDand an optional expression (specified after the when keyword) that can be used to match properties on the inbound message and/or the contact.
There are two types of Triggers:
- Inbound Message Triggers: these Triggers execute when a user messages your service.
- Time Triggers: these Triggers execute at a specified date/time or some time before/after a specific event (as in "2 hours after sign up"). They can also be configured to run periodically on a schedule (like "every monday at 15:00").
We break down the code aspects of triggers in the following sections, but you can also learn by doing - create a trigger in the no-code canvas and then switch to code view in order to view the generated code. Please note that the code is read-only and you cannot edit the code directly:
Inbound Message Triggers
These Triggers execute when a contact messages your service. The following events are supported:
MESSAGE RECEIVED: triggers when a contact send a message to your service.FIRST TIME: triggers when a contact messages your service for the very first time.CATCH ALL: triggers if no Trigger (or Automation) handled the inbound message.
You can further refine the Trigger by providing an expression that matches the properties of the inbound message and/or the properties of the contact who sent the message.
The following example matches messages containing the word "hi" but only for contacts that have opted in:
trigger(on: "MESSAGE RECEIVED")
when has_phrase(event.message.text.body, "hi") and contact.opted_in == true


card FirstCard do
    text("Welcome opted-in user!")
end
In the expression, you can refer the inbound message with event.message (and its body with event.message.text.body) and the contact who sent the message with contact. To refer contact profile fields, you can use the contact.field_name_here syntax.
You can also create a trigger that checks if the sent message was a media (image, video, audio) instead of a text. More information on how to setup this trigger can be found here.
The following Expressions are supported in Inbound Message Triggers:
has_all_membershas_any_memberhas_any_beginninghas_any_endhas_any_exact_phrasehas_any_phrasehas_all_wordshas_any_wordhas_beginninghas_datehas_date_eqhas_date_gthas_date_lthas_emailhas_endhas_grouphas_memberhas_numberhas_number_eqhas_number_gthas_number_gtehas_number_lthas_number_ltehas_only_phrasehas_only_texthas_patternhas_phonehas_phrasehas_texthas_timeisboolis_nil_or_emptyisnumberisstring
All of the boolean operators and syntax discussed for when statements are supported within a message trigger.
Time Triggers
Time Triggers execute at a specified date/time or some time before/after a specific event (as in "2 hours after sign up"). They can also be configured to run periodically on a schedule (like "every monday at 15:00").
The following Time Triggers are supported:
- Specific-time: triggers at a specified datetime, for example:
trigger(at: "2024-09-13T15:45:00Z"). - Recurring: triggers on a cron-like recurring schedule, for example:
trigger(every: "30 15 * * MON"). - Relative to a profile field: triggers some time before/after the datetime value contained in a contact profile field, for example:
trigger(interval: "+3d", relative_to: "contact.due_date").
As with Inbound Message Triggers, it is possible to further refine the Trigger by providing an expression after the when keyword. The expression acts as a filter for your contacts: the trigger will be executed for all the contacts for which the expression returns true.
As an example, the following Trigger will execute every Tuesday at 10:30 for all contacts that have the is_pregnant profile field set to true:
trigger(every: "30 10 * * TUE") when contact.is_pregnant == true
The following Expressions are supported in Time Triggers:
All of the boolean operators and syntax discussed for when statements are supported within a time trigger.
An important note on message templates: when using Time Triggers it's often hard to tell if the trigger will execute inside WhatsApp's 24 hours service window for a contact. Since WhatsApp only allows sending message templates outside the 24 hours service window, we strongly suggest using message templates (in place of normal messages) in journeys using Time Triggers.
Specific-time Triggers
Specific-time triggers will execute at the specified datetime for all contacts for which the provided expression evaluates to true.
The datetime is provided with the at: parameter and must be a valid ISO8601 datetime string.
For example, the following journey will trigger at 15:45 on the 13th of September 2024 for all contacts having the opted_in field set to true or the registration_status field set to "completed".
trigger(at: "2024-09-13T15:45:00Z") when
  contact.opted_in == true or contact.registration_status == "completed"
Recurring Triggers
Recurring triggers will execute on a recurring schedule specified using a cron schedule expression.
We recommend using the Crontab Guru website to build and validate your cron expression. Please note that the cron expressions will be evaluated using the UTC timezone.
It is also possible to specify an end date for the recurring trigger by specified the optional until parameter. The until parameter needs to be a valid ISO8601 datetime value.
For example, the following trigger will execute every Monday at 15:30 (until September 13 2025) for all contacts having the language field set to any value other than "eng".
trigger(every: "30 15 * * MON", until: "2025-09-13T15:45:00Z") when
  not has_phrase(contact.language, "eng")
Triggers relative to a profile field
These triggers execute at a specified time interval relative to the datetime value contained in a profile field.
For example, they can be used to trigger a journey 2 hours after a contact enrolls in a program:
trigger(interval: "+2h", relative_to: "contact.enrolled_at") when
  has_phrase(contact.project_enrolled, "project_a")
The relative time interval is provided as the interval argument and must be a string composed by the following elements:
+or-sign, where+means after and-means before.- an integer
- a time unit from the following supported ones:
mfor minutes.hfor hours.dfor days.wfor weeks.Mfor months.
The contact field must be of type date and must be specified as the relative_to argument using the "contact.field_name" syntax.
The following example messages the user 3 days before their birthday:
trigger(interval: "-3d", relative_to: "contact.birthday")

card UpcomingBirthday do
  send_message_template("birthday_3d_before", "en", [])
end
It is also possible to override the time at which the trigger should execute by using the target_time option (specified as a valid UTC ISO8601 time string). This is useful when using interval units such as days/weeks/months to avoid messaging people at inconvenient times.
For example, the following Trigger will execute 2 weeks before the contact's due_date datetime field value at exactly 15:30:
trigger(interval: "-2w", relative_to: "contact.due_date", target_time: "15:30:00") when
  contact.is_expecting == true
Global Triggers (Interrupting Triggers)
Global Triggers allow a journey to act like a universal "home button" that can interrupt whatever flow a user is currently in and start this journey instead. Typical examples are keywords like "menu", "home", "help", or "start over" that should always take users to a designated journey.
To make a trigger interrupt other journeys, mark an inbound trigger as global.
Syntax
trigger(on: "MESSAGE RECEIVED", global: true)
when has_any_exact_phrase(event.message.text.body, ["menu", "home", "start over", "help"])

card FirstCard do
  text("Welcome! You're back at the main menu.")
end
How it works
- When a message matches a global trigger, it will immediately stop any currently running journey for that contact and start this journey from its first card.
- Only inbound message triggers can be global.
- Define the global trigger in the journey that you want to start when the keyword is detected (e.g., your main menu journey).
Examples
-
Home menu: Provide a "menu" keyword that always takes users back to your main menu, creating a reassuring way to recover from getting lost in a long flow.
trigger(on: "MESSAGE RECEIVED", global: true)when has_only_phrase(event.message.text.body, "menu")card HomeMenu dotext("Main menu")# ... present optionsend -
Speak with a person: Let users type "agent" at any point to jump to a human-support journey.
trigger(on: "MESSAGE RECEIVED", global: true)when has_only_phrase(event.message.text.body, "agent")card ConnectToHuman dotext("We'll connect you to a person.")# ... handover flowend -
Invoke an AI assistant: Allow a keyword like "assistant" to route the user to an AI triage journey from anywhere.
trigger(on: "MESSAGE RECEIVED", global: true)when has_only_phrase(event.message.text.body, "assistant")card AIRouter dotext("How can I help?")# ... AI routing logicend
Best Practices
- Tell users about them: Mention escape keywords at entry points or during longer flows so users know they exist.
- Keep keywords simple: Choose intuitive, easy-to-remember words. Avoid ones that naturally occur in conversation unless you restrict matching (e.g., use
has_only_phrase). - Reserve for special cases: Too many global triggers increase accidental interruptions and create a poor experience. Keep the list small and purposeful.
Variables
As in many programming languages, variables can be used to store values. All variables declared in a journey are available to all the cards in the journey, and not just in the card where the variable was created.
The values assigned to variables are only available for the duration of the journey and will get lost once the user finishes interacting with the journey. if you need to save data for later retrieval (for example to retrieve it from some other journeys in the future), please read about contact profiles.
card CardOne do
  first = 2
  then(CardTwo)
end

card CardTwo do
  second = 3
  result = first + second
  then(CardThree)
end

card CardThree do
  # This sends the message "The result is: 5"
  text("The result is: @result")
end
Interacting with the 'event' object
Journeys can receive and process different message types from users: text, images, videos, audio, documents, and location data. Understanding how to work with these message types starts with the event variable which can be accessed by using @event.
The event Variable
When a user sends a message, Turn.io creates an event variable that contains all information about that message. This includes the message content, sender information, message type, and media metadata.
Event Structure
Here's what the event variable looks like when a user sends an image:
%{
  "message" => %{
    "_vnd" => %{
      "v1" => %{
        "author" => %{
          "id" => "491111222333",
          "name" => "James Doe",
          "type" => "OWNER"
        },
        "chat" => %{
          "contact_uuid" => "4468d47c-b8f4-4e7c-859d-0f88075e57b8",
          "owner" => "+491111222333",
          "state" => "OPEN",
          "uuid" => "362eac5a-af1b-4ad9-badc-8deaf48c4645"
        },
        "direction" => "inbound",
        "inserted_at" => ~U[2024-12-05 10:42:24.701578Z],
        "uuid" => "05aafc7a-4685-5d9e-8148-13acd50510bd"
      }
    },
    "from" => 491111222333,
    "id" => "wamid.HBgNNDkxNz...",
    "image" => %{
      "caption" => nil,
      "id" => "2060181771091421.jpg",
      "mime_type" => "image/jpeg",
      "sha256" => "uoPd3p1CX0kqeRbCGnUF8UgqYi3uHkwWwbv3BIljI20="
    },
    "timestamp" => 1733395341,
    "type" => "image"
  },
  "type" => "message"
}
Key Parts of @event
| Field | Description |
|---|---|
event.message.type | The type of message received |
event.message.from | The sender's phone number |
event.message.timestamp | When the message was sent |
event.message._vnd.v1.chat | Chat and contact information |
Accessing Message Type
The most important field for handling different message types is @event.message.type. This tells you what kind of message the user sent.
Using @event.message.type
@event.message.type
This expression returns a string value:
| Return Value | Description |
|---|---|
"text" | Text messages |
"image" | Image files (JPEG, PNG) |
"video" | Video files |
"audio" | Audio files |
"document" | Documents (PDF, DOCX, etc.) |
"location" | Location data (latitude, longitude) |
"interactive" | Interactive button or list replies |
"button" | Template button responses |
Accessing Media Metadata
When @event.message.type is a media type, additional fields become available with media information:
For Images
@event.message.image.id- Media ID to fetch the file@event.message.image.mime_type- File type (e.g., "image/jpeg")@event.message.image.caption- Optional caption text
For Videos
@event.message.video.id@event.message.video.mime_type@event.message.video.caption
For Documents
@event.message.document.id@event.message.document.filename@event.message.document.mime_type
For Audio
@event.message.audio.id@event.message.audio.mime_type
For Interactive Messages
@event.message.interactive.button_reply.title- The text of the button the user clicked (for interactive buttons)@event.message.interactive.list_reply.title- The title of the list item the user selected (for interactive lists)
For Template Button Responses
@event.message.button.text- The text of the template button the user clicked
Using Message Type in Triggers
You can trigger journeys automatically when users send specific media types instead of text messages.
Trigger Examples
Trigger on Images Only
trigger(on: "MESSAGE RECEIVED") when event.message.type == "image"
Trigger on Images or Videos
trigger(on: "MESSAGE RECEIVED") when event.message.type == "image" or event.message.type == "video"
Trigger on Any Media (Not Text)
trigger(on: "MESSAGE RECEIVED") when event.message.type != "text"
Using Message Type in Cards
Inside a journey, you can use event.message.type to branch flows based on what the user sends.
Basic Conditional Handling
Use CodeBlock cards with when clauses to handle different message types:
# Handle media messages
card HandleMedia when event.message.type != "text" do
  text("You sent a @event.message.type message")
  text("I'm processing your media now...")
end

# A default condition that handles text messages
card HandleText do
  text("You sent a text message")
  text("Let me help you with that...")
end
Validating Expected Media Types
When you ask users for specific media, validate their response:
card AskForPhoto, then: ValidPhoto do
  ask("Please send a photo of your ID document")
end

# User sent an image - correct!
card ValidPhoto when event.message.type == "image" do
  text("Perfect! Processing your ID photo...")
  update_contact(id_photo: @event.message.image.id)
end

# User sent something else - wrong
card InvalidResponse when event.message.type != "text" do
  text("Please send an image file, not a @event.message.type")
  run_stack("AskForPhoto")
end

# User sent text - remind them
card TextResponse do
  text("I need a photo of your ID. Please take a picture and send it.")
  run_stack("AskForPhoto")
end
Handling Multiple Media Types
card AcceptImageOrVideo when event.message.type == "image" or event.message.type == "video" do
  media_type = event.message.type
  text("Great! Received your @media_type")
  then(NextStep when media_type == "image")
  then(NextStepVideo when media_type == "video")
end

card RejectOther do
  text("Please send only images or videos")
end
Handling Interactive Buttons and Lists
When users interact with button or list messages, you can access their selection through the @event.message variable:
# Handle interactive button replies
card HandleButtonReply when event.message.type == "interactive" do
  button_choice = event.message.interactive.button_reply.title
  text("You clicked: @button_choice")

  then(ProcessYes when button_choice == "Yes")
  then(ProcessNo when button_choice == "No")
end

# Handle interactive list replies
card HandleListReply when event.message.type == "interactive" do
  list_choice = event.message.interactive.list_reply.title
  text("You selected: @list_choice")
  update_contact(product_interest: "@list_choice")
end

# Handle template button responses
card HandleTemplateButton when event.message.type == "button" do
  button_text = event.message.button.text
  text("You clicked: @button_text")
end
Parent/Child variables in Journey Sessions
When building complex conversational flows, you often need to create modular journeys where one journey (the parent) launches another journey (the child) and then resumes after the child completes. Journeys supports this through parent/child variable passing, enabling you to share data between these nested journey sessions.
Parent/child variable passing allows hierarchical journey execution where:
- A parent journey can launch a child journey
- The child journey automatically receives access to the parent's variables
- When the child completes, its variables are passed back to the parent
- The parent can then continue execution with access to the child's results
This enables complex, multi-stage conversational flows with shared state while keeping individual journeys focused and reusable.
How Variable Passing Works
Parent to Child Flow
When a parent journey spawns a child journey, the child automatically receives access to all the parent's variables through a special parent variable in its context.
In the child journey:
card ChildCard do
  # Access variables from the parent journey
  parent_name = parent.user_name
  parent_age = parent.user_age

  text("Hello @parent_name, I see you're @parent_age years old!")
end
Child to Parent Flow
When a child journey completes, all its variables are passed back to the parent journey as a child object.
In the parent journey, after the child completes:
card ParentResumeCard do
  # Access variables returned from the child journey
  child_result = child.completion_status
  child_score = child.final_score
  child_data = child.collected_info

  text("Child journey completed with status: @child_result")
  text("Final score: @child_score")
end
Content Tables
A common use-case when writing Journeys is to store some content in a way that makes it easy to interact with from a card.
An example is a 10 question survey. The logic described in the cards doesn't need to change if the content was updated to have fewer or more questions. We simply just want to go through all available questions one by one until all have been answered.
Content Tables are great for these kinds of use cases. They have a unique name and function much like a spreadsheet, allowing one to specify columns with names and rows for each.
From within a card, the content table's rows can be read one by one using Expressions.
Tables have a list attribute called rows which gives access to all the rows in the table. Each individual row's values can be addressed using the column's name in lowercase.
card TextCard do
  row = table_0.rows[0]
  text("""
  The value of the first rows is: @row.column_1, @row.column_2, and @row.column_3
  """)
end

Parameters
Often, as one writes journeys, there will be common bits of text and values that are re-used between cards. Think of things like the welcome text on a button that takes one back to the main menu for example.
It's often desirable to present these common elements in an easily editable interface outside of code objects in a Journey.
Parameters are great for this as they allow one to assign a name to a commonly reused element and provide a default value for it. When writing cards, one can then reference to these values by name using Expressions
Parameters are similar to Content Tables except that they are optimised for reading individual values from rather than combined rows.
The values in parameters are stored in an attribute called items from where the individual entries can be read by name in lowercase.
card TextCard do
  text("""
  @parameters_0.items.welcome_text

  @parameters_0.items.intro
  """)
end
Use multi-line text
Multi-line text is wrapped by triple quotes (""") and allows you to easily represent text spanning over multiple lines.
card QuestionCard do
  ask("""
  Welcome!
  Is "Jane" your name?
  """)
end
It also allows you to use quotes (") inside without having to escape them:
card Card do
  data = parse_json("""
  {
    "my": "json",
    "structure": [1, 2, 3]
  }
  """)
end
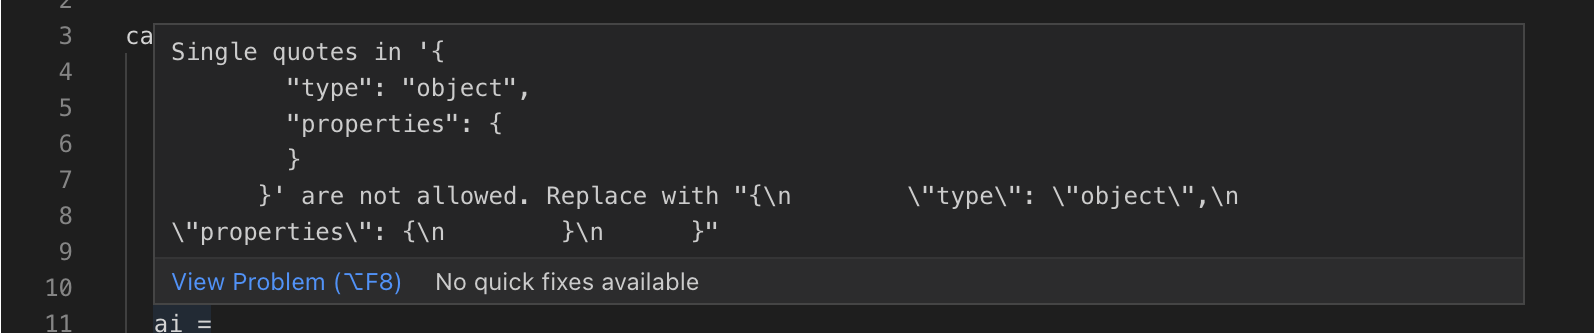
Single quotes are no longer supported for string values. This was previously supported but going forward this will generate an error when saving a journey.
If you are using single quotes like the following example:
map(0..10, &concatenate(&1, ', ')
Use double quotes instead:
map(0..10, &concatenate(&1, ", ")
If you are needing to use quotes in a string you can escape them with a backslash: \".
map(0..10, &concatenate(&1, "\","))
The code block will alert you when you are using single quotes the next time you save your code:
Common errors
- All the lines including the triple quotes, must be indented at the same level, per the example below.
- Don't put any text in the same line as the triple quotes. For example, don't do
ask("""Welcome, onlyask("""and the text on the next line.
Formatting text
WhatsApp allows you to format your text into bold, italics, strike-through and monospace.
| Format | Syntax | Example |
|---|---|---|
| Italics | place an underscore () on both sides of the text | _your text_ |
| Bold | place a star (*) on both sides of the text | *your text* |
| Strikethrough | place a tilde (~) on both sides of the text | ~your text~ |
| Monospace | place three backticks (```) on both sides of the text | ```your text``` |
Journey Performance
When creating Journeys, we encourage keeping performance in mind; creating rapid and responsive services for your end users on WhatsApp. One of the things that we do in order to encourage a responsive service is to set a hard timeout of 30 seconds for Journeys to complete a single action or line within a Journey. For example if you rely on a number of outbound webhook calls to augment your service, ensure that they respond within a reasonable amount of time to allow for conversations to flow naturally. We do make some performance allowances for external calls to genAI services, but we will still enforce an eventual timeout on those services.
Resuming a Journey
A journey can automatically resume even after its session has expired, allowing for seamless conversation continuity. This happens when:
- The message is a response to any outbound message (text or interactive) from that journey
- It was the last journey the contact interacted with
- The response is received within 7 days of the last interaction
This is particularly useful for:
- Handling delayed responses from contacts
- Maintaining conversation context across session boundaries
- Providing a natural conversational experience even with gaps in interaction
For example, if your journey sends a question and the contact responds several hours later after the session expired, the journey will still pick up from where it left off and process the response appropriately.
This handles both text responses and interactive responses (button clicks and list selections), since interactive responses reference the original outbound message that contained the interactive elements.